GETTING STARTED:
Note: In order to use AutoPay your school should be signed up with Pay Simple and using the "pay now" feature.
1. Click on the Financial tab

1. Click on the Admin tab and select Settings.
2. Under Online Payments, check the box that says "Enable Online Payment Features"; this will cause a new box to appear called "AutoPay Payment Plans".
3. Check the box labeled "Enable New Interface with AutoPay Support (Recurring Payments)".
Note: Currently AutoPay will only be active on your Admin interface. Parents will not see or be able to use AutoPay unless you check the box labeled "AutoPay for Parents".
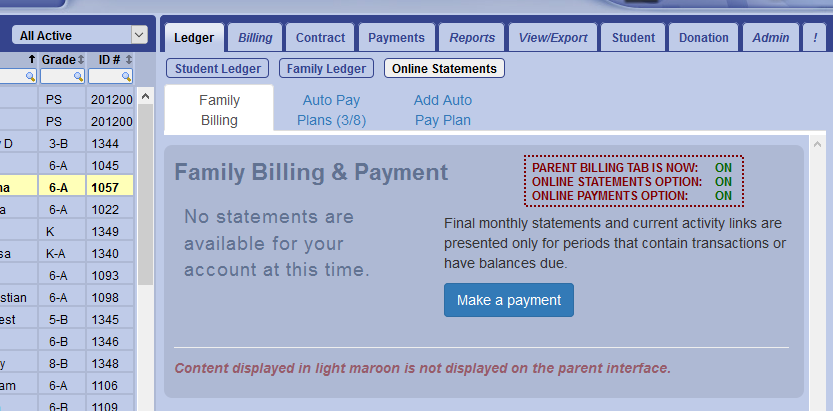
2. Click on the Ledger and select a student.
1. The Family Billing tab is the same as before.
2. Now there is an Auto Pay Plans tab.
Note: The numbers indicate how many AutoPay plans there are. Current / Total.
3. Select, Add Auto Pay Plan.

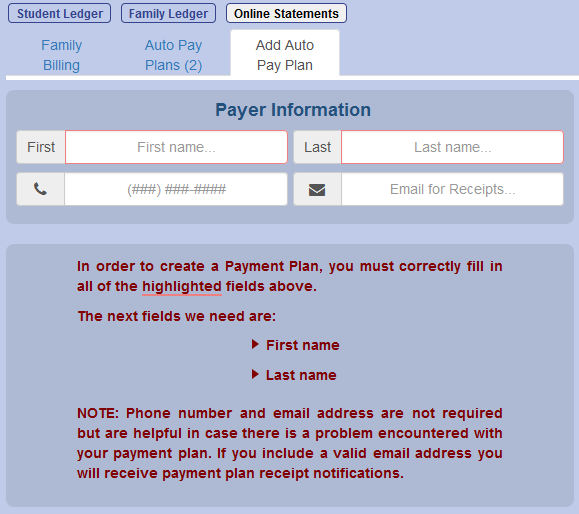
1. Fill in the appropriate payer information. First and Last are required.
2. The information below will provide continuous detailed instruction.
The form will display progressively as you fill it out. The first information required is the name of the Payer. Phone number and email address are helpful too but not required. The section below the input fields provides continuous, detailed instructions on how to proceed.
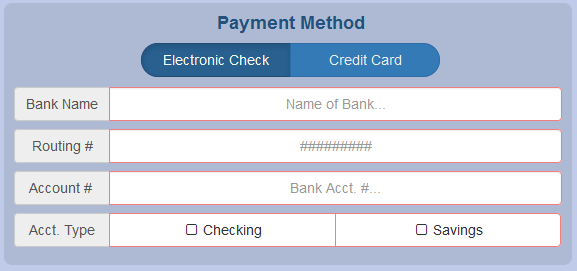
4. Payment Method

1. After filling out a payer name, you will see a section open for Payment Method. Select either Electronic Check (ACH) or Credit Card method and fill in the details.
5. Schedule

1. Schedule between 1 and 13 payments.
2. Fill in the total amount. The system will automatically spit the payment.
3. Notice that the Convenience Fee is automatically filled in. To learn more about Convenience Fees, click here. Note: Convenience fees will only be set once the plan is created. If they are changed after, it will not update the plan.
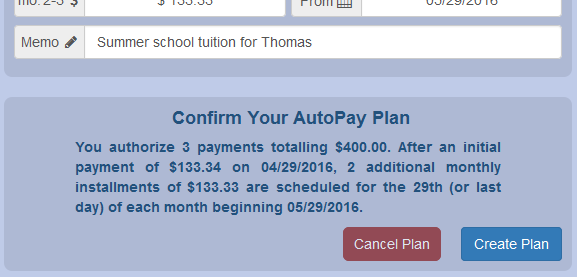
4. Fill in the memo field to indicate the purpose of the payment.
Note: If not all required fields are filled in, the Create Plan will not show.
6. Confirm

1. If everything looks good, press the Create Plan button and a message will be displayed confirming that the system is creating the plan. This takes a few seconds to complete.

2. As soon as the plan has been created, the system will display the new plan on the list of AutoPay plans by switching to the center tab described in step 7...
7. Newly Created Auto Pay Plan
1. The AutoPay plans presented were all created under the currently selected student.
2. Each payment plan has a show/hide details button that you can use to view more information about the plan.
3. There is also a Suspend button that will halt a payment plan indefinitely or until you wish to resume it.
This is an important fact to understand about how Pay Simple processes these plans... If you create a 3-payment plan, then a maximum of 3 payments will be generated. But the payments generated are just like one-off payments and they may succeed or fail for usually reasons such as insufficient funds, an expired credit card date, etc. If an installment on a payment plan fails, it will not be reattempted automatically. In the section below on Reporting we will talk about this further, but it is important to understand that a supplemental payment will be required if an installment fails. A single, supplemental payment can be made by creating a 1x AutoPay plan schedule for today or a future date, or you can use the Pay button from the Billing tab to process the supplemental payment. If an AutoPay payment failure is due to a chronic issue like incorrect or expired payment information, then the payment plan should simply be suspended since it would continue to fail, and a new payment plan can be created to finish off the remaining installments using corrected information.


