
A guide for school staff.
This guide shows how to create, edit, duplicate, delete and conclude classes on the Classes tab, and introduces the Analyze Classes tool. Class types, grade scales, sub-grades and graduation requirements are covered in their own articles.
1. Create a class
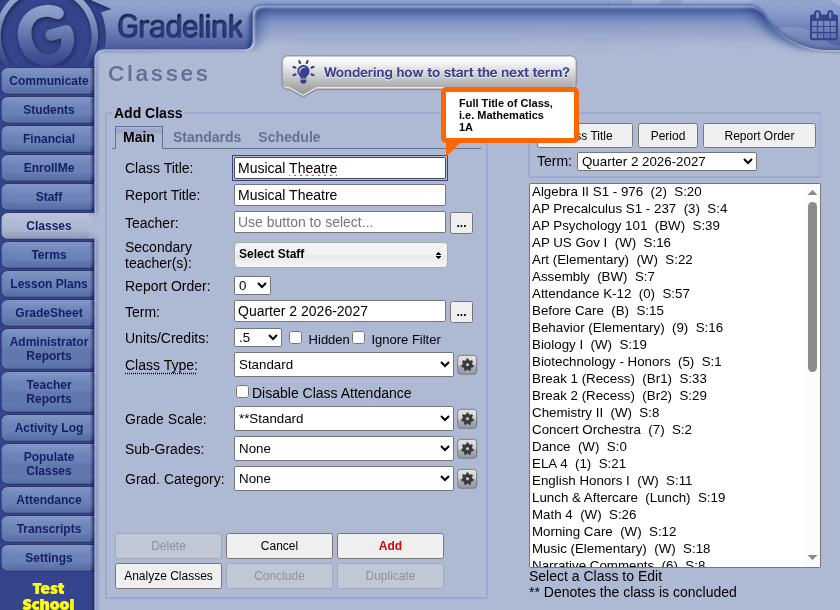 1 2 3 4 5
- 1From the Gradelink dashboard, click the Classes tab on the left. Existing classes are listed on the right, organized by term.
- 2Enter a Class Title, the name used inside Gradelink and on transcripts.
- 3Enter a Report Title, the name shown on report cards, progress reports and in the Student/Parent interface.
- 4Fill in the remaining fields (see the table below).
- 5Click Add at the bottom of the form. If several classes share most settings, use Duplicate instead of building each by hand.
| Field | What it does |
|---|---|
| Teacher | Click the … button and pick a teacher from the list on the right. |
| Secondary teacher(s) | Gives a second teacher or an aide access to the class. |
| Report Order | Classes are listed on the report card in ascending order; classes with the same value are sorted alphabetically. |
| Term | Defaults to the first active term. Choose another (with …) when preparing an upcoming term. |
| Units/Credits | Credits the class is worth. With parent terms, enter the total credits earned per parent term (e.g. two quarters in a semester: each quarter class gets the semester's total). |
| Hidden | Keeps the class off report cards, progress reports and the Student/Parent interface; its grades are not saved to the transcript or permanent record. |
| Ignore Filter | Forces the class onto a student's transcript regardless of other settings (e.g. a middle school class on a high school transcript). |
| Class Type, Grade Scale, Sub-Grades, Grad. Category | See the related articles on these topics. |
2. Edit, duplicate or delete a class
Select a class in the list on the right; its details fill the form on the left (now titled Edit/Delete Classes). Make your changes and click Save. Click Duplicate to create a copy. Gradelink numbers the copy automatically: duplicating Musical Theatre creates Musical Theatre 2, and duplicating Musical Theatre 2 creates Musical Theatre 3. This makes it quick to build the same set of classes for several grade levels.
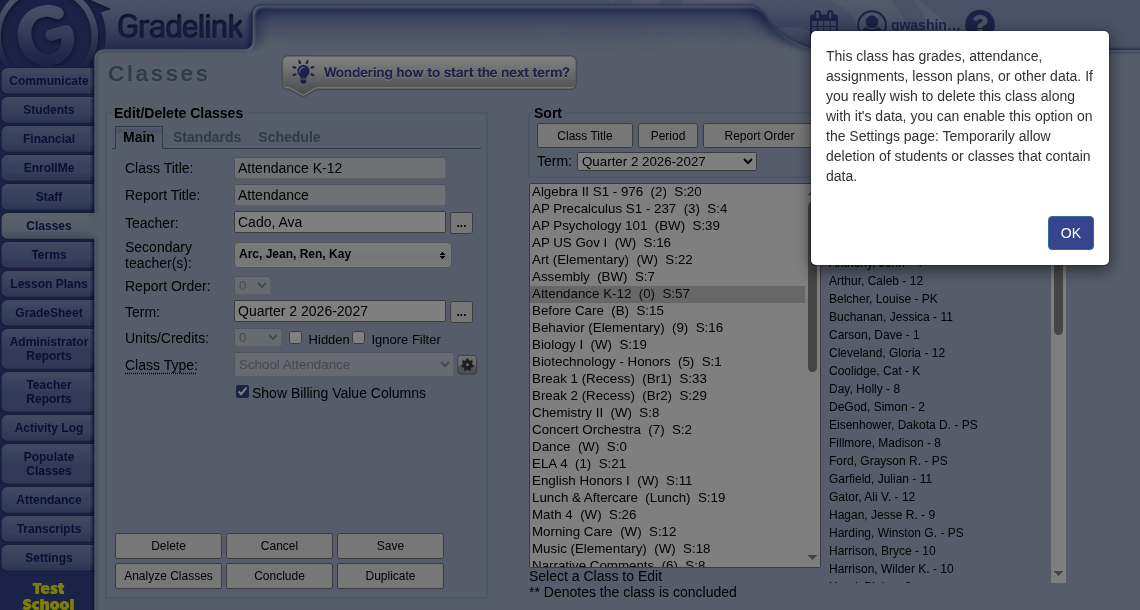
By default, a class containing grades, attendance, assignments, lesson plans or other data can't be deleted. Administrators can allow it with the Settings option Temporarily allow deletion of students or classes that contain data.
3. Conclude classes
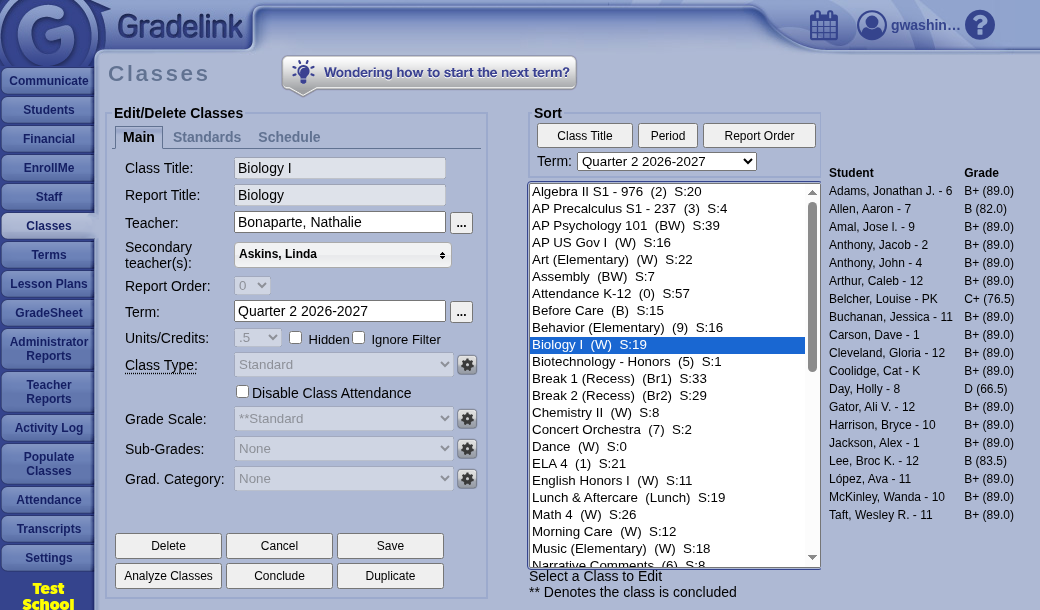
Concluding a class creates its permanent record; with few exceptions, its grades and attendance can no longer be changed. Gradelink recommends that teachers conclude their own classes, but administrators can do it two ways:
- One class: select it on the Classes tab and click Conclude.
- All classes in a term: once you're sure teachers have finished entering grades, click Conclude on the Terms tab.
4. Analyze Classes
Changes made to classes between terms can cause conflicts. Click Analyze Classes to compare multiple terms: it shows which classes appear only in certain terms and whether class titles, sub-grades and similar settings changed.
Prefer video?
This walkthrough is also available as a short video.